基于openmv的图像识别
openmv简介
OpenMV是一个开源,低成本,功能强大的机器视觉模块,以STM32F427CPU为核心,集成了OV7725摄像头芯片,在小巧的硬件模块上,用C语言高效地实现了核心机器视觉算法,提供Python编程接口 。同时 OpenMV也是一个可编程的摄像头,通过Python语言可实现你想要的逻辑。而且摄像头本身也内置了一些图像处理的算法,使用起来也更加的方便,仅需要写一些简单的Python代码,即可轻松的完成各种机器视觉相关的任务。
1 | 在本次赛事中我们听到的最多的怨言就是(openmv4运行内存只有1MB,而openmv4plus运行内存有32MB!) |
一、打开OpenMV IDE软件
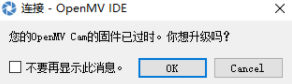
选择Cancel(不升级即可)!
二、openmv4的数字模板匹配识别
openmv4的数字识别的基础是需要配置使用NCC模板匹配。通过NCC模板的匹配可把
需要识别的数字模板图片保存到SD卡中,然后可进行下一步的识别。
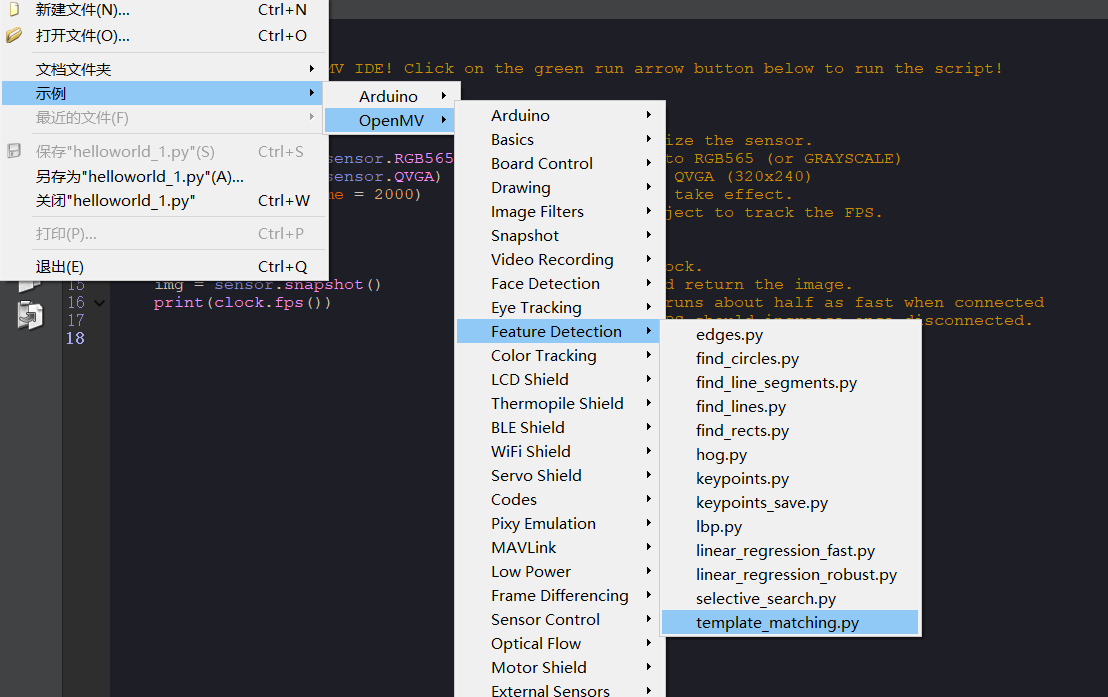
1、我们通过打开模板匹配的历程来直接打开代码使用
点击文件——示例——openmv——feature detection——template_matching.py
2、如果运行出现这个窗口那就说明你没有保存模板图片。

这时我们就需要创建一个模板图片。
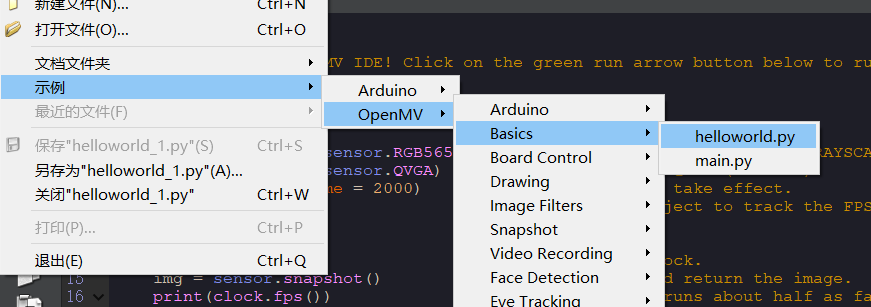
3、首先要打开一个helloworld历程文件
点击file——examples——01-basics——helloworld.py
4、在helloworld历程文件中进行匹配0~9这样的数字
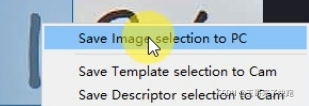
对这些数字进行一一截取(打开摄像头,图像中出现数字之和关闭摄像头,在图像中截取数字,右键选择将图像选择保存到PC),用它们来作为我们的模板图片(此时图片格式后缀为bmp格式)。
在右边的Frame Buffer框中进行截取
注意:不要点Zoom,因为Zoom展示的是放大后的效果,在识别时可能会导致失帧。
例如:本人截取的一张图片(目前后缀还是bmp)

注意:模板图片的格式一定要是pgm的格式
星瞳科技给了一个网址:https://convertio.co/zh/bmp-pgm/,其他的网站也是大同小异
这个网站用不了的话可以去百度啥的地方随便搜一个
点击选择文件(刚刚截图的模板图片)
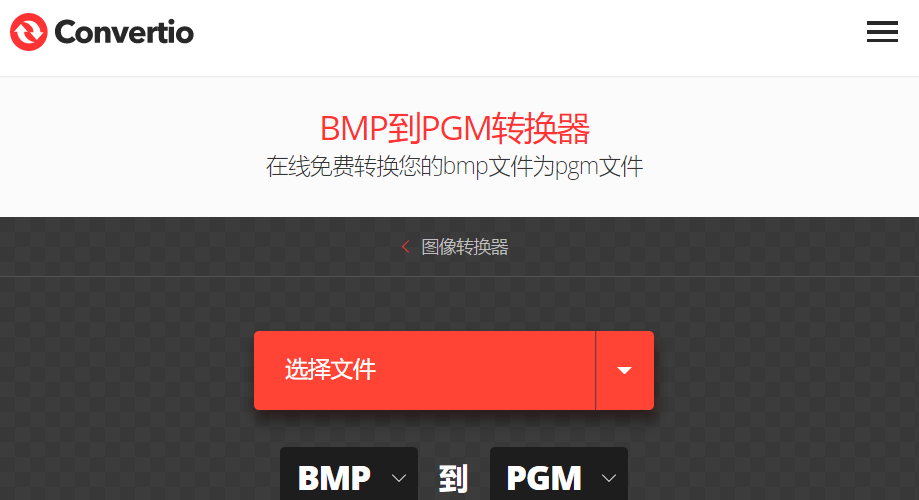
打开所选的图片,点击转换(注意是不是转换到PGM格式,如果不是请换到PGm格式)

转换完成之后点击下载即可,此时图片后缀为PGM格式。
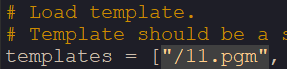
5、将转换的数字图片(PGM)进行保存,一定要保存到OpenMV4的SD卡中,名称自定义
6、把template.pgm改为你命名的模板图片(PGM)的名称

例如:我命名的为11
7、改完即可运行
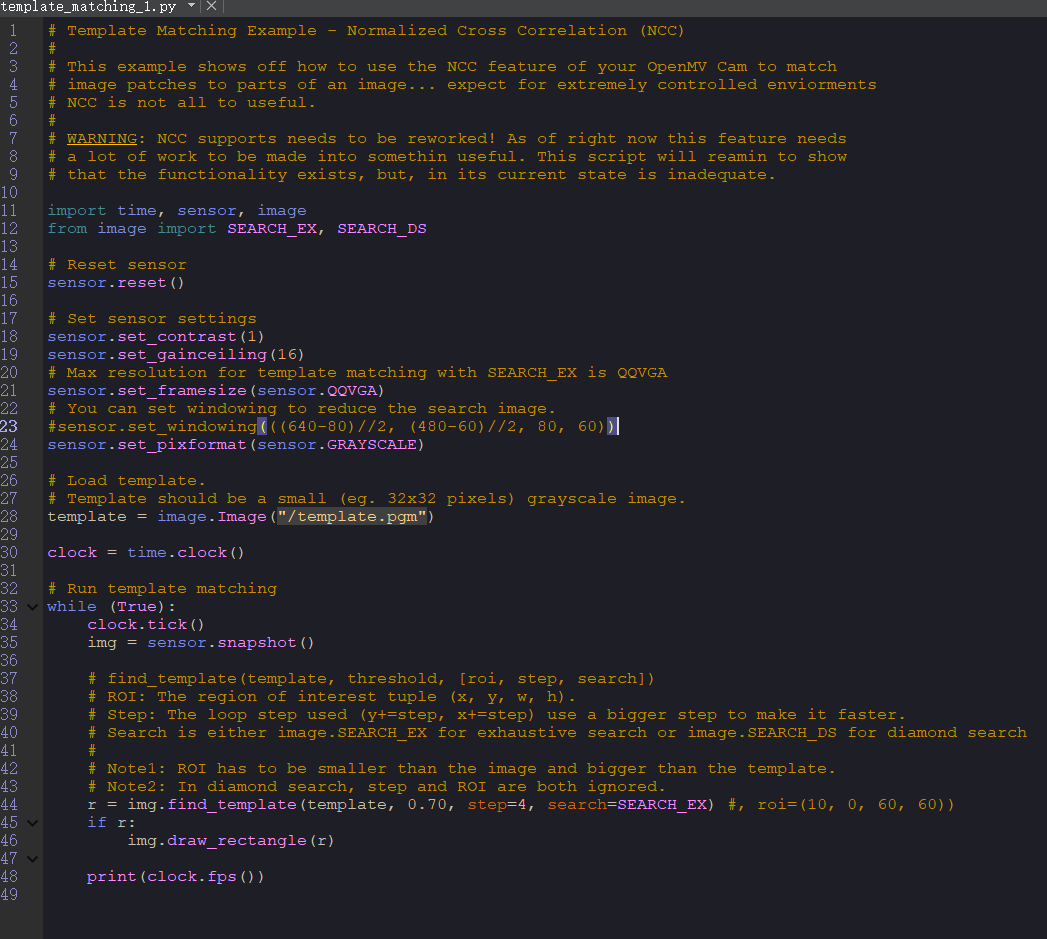
官方数字识别源代码,此代码为源代码,可在此基础上进行改动。
1 | # Template Matching Example - Normalized Cross Correlation (NCC) |
openmv的Lenet数字识别
1、简单的de个bug
我估计很多人看到了这个nn识别的方案,但是我估计很多人倒在的这个地方
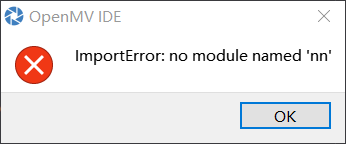
因为官方把这个model给删除了(笑),另外还要注意一点,这个nn模型只支持3.6.5及以前的固件版本,如果你的固件是最新的版本的话,请刷回来老的固件版本才能使用。固件的话,自己去github找去。

这个模型,我队友通过万能的淘宝给找回来了(笑)。点击下载模型文件,注意:该文件分享有效期为该文章发表日期起十日
2、简单的跑个例程
刷好固件,存进去模型之后就可以运行了,例程如下:
1 | # LetNet数字识别例程 |
具体的效果图我忘记存了,改天重现一下,但是这个方案的结果是:识别效果很垃圾!3,6,9不分1,7不分,2,4不分,再加上帧率只有tm的5帧,不适合放在车上边移动边识别(哪怕你停下来识别效果也很拉)
3、简单的训个模型
这个是使用的官方的nnlenet模型,其实我们蛮可以自己训练一个,官方也在下面说过,可以自己训练模型。

所以我自己训练了一个简单的模型,点击打开模型示意图,因为博主也不是相关技术人员,怕带偏你们,所以就不介绍怎么炼丹了。
因为没学过相关内容,就简单找了找教程,自己搞个足够大的数据集,然后丢进炼丹炉,然后练好后取出。模型文件(注意:该文件十日后失效)
官方例程:
1 | # OpenMV Image Classification Example |
好巧不巧,这个效果图我也忘记保存了,改天补上。这个模型的识别效果就比nn好多了,但是仍然有一些不足,3,6,9仍然会有混滫错误。没办法,内存就那一丁点,跑不了太大的model。
基于k210的数字识别
因为电赛还没评定完成,暂时空着
后记
真是意想不到竟然拿了个国一,但是老师出于要宣传还是什么的原因,还是不让碰作品,我手头也没有K210所以呢,芬分享啥的再咕几天吧。


- 本文链接:https://www.darkfox.top/posts/694f8495/
- 版权声明:本博客所有文章除特别声明外,均默认采用 许可协议。